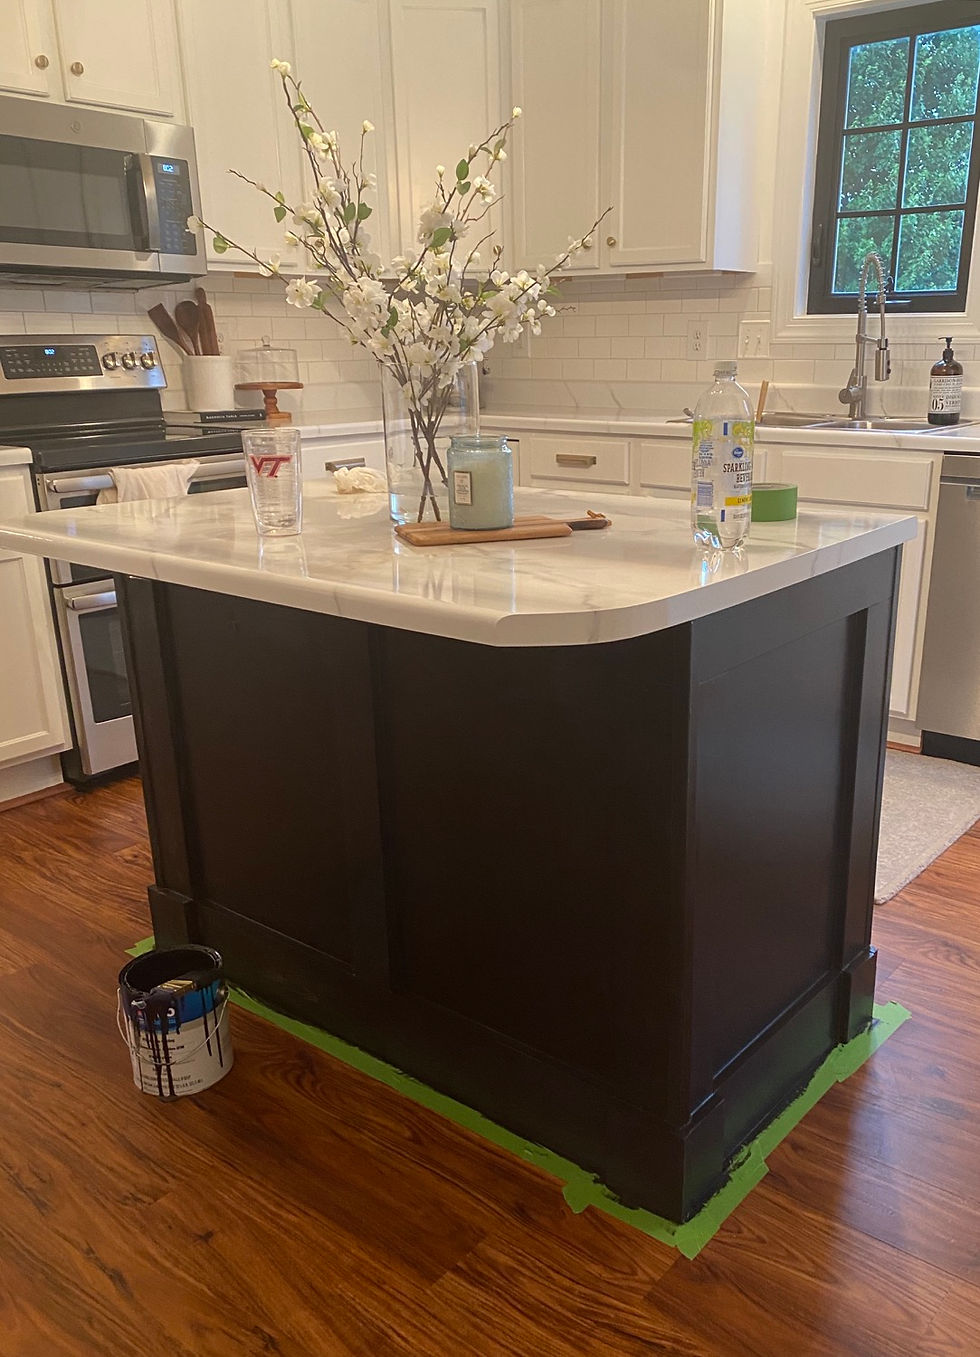
DIY Kitchen Island Update
- Britt Staggers
- Aug 1, 2020
- 2 min read
About the project:
One of the selling points of our house was the space for a kitchen island. Though, not the prettiest, I was still super excited about it - extra storage and prep space (for all that cooking I don't do haha)! Its a standard builder grad island and something I figured we could replace, but after looking at a few custom islands, I realized very quickly that it wasn't in our budget. So then I started searching "how to upgrade builder grade island" on Pintrest and came across this tutorial! (I already had an island so I skipped down to the framing steps!) It was easy and cheap - exactly what I was looking for! I'm a huge believer that things don't have to be expensive to look nice! You can work with what you have and within your budget AND still have a Pintrest-worthy home!
Materials:
Hammer and crowbar (to pull off old trim)
Nail gun
Mitre saw
Tape measure
Sand paper
Pencil
(3) 1x4x8 primed MDF boards
(1) 1x6x8 primed MDF board
(2) 8 foot corner trim pieces
Painters tape
Paint brush
Paint
Step 1:
Decide on the design you want on the island. I went with a simple design so I wouldn't have to cut angles or get fancy trim.

Step 2:
Use the crowbar to pull off the old molding. Literally just rip it off! This might take a little muscle depending on how old it is!
Step 2:
Start the framing with the MDF boards. (I almost always use primed MDF boards because they require less painting). I started by measuring, cutting, and nailing the bottom boards and then I measured, cut, and nailed the top boards. I'm 100% a visual person so it's easier for me to get more accurate measurements as I'm placing boards up instead of measuring and cutting it all before hand. It's also important to note to measure at each spot - just because one side measures at 36" doesn't mean the other side will measure the same (I've learned this the hard way so. many. times) I used the 1x6 MDF board for the bottom and 1x4s for the rest! I also placed 1x6 squares at the bottom corners to create faux feet for an added touch!
I used a piece of corner trim at the corners so I didn’t have to mitre the corners! It’s not the “correct” way to do it, but it’s a little short cut!

Step 3:
Once all of the boards are nailed and in place fill the board seams with wood filler. Wood filler is easy to sand and blends better for seams that you want to make look like they're one board. Then caulk the seams where the boards meet the island to fill in the gaps! Let both dry ( I typically try to give it at least an hour)

Step 4:
Time for paint! Start by taping off the floor. I’ve learned the hard way that taking the time to tape is a lot easier than trying to cut in with out it and cleaning up later! Then start painting! My favorite cabinet paint is Valspar cabinet paint from Lowes - it’s durable and cleans easy! But in the name of saving a few bucks, I used some black paint we had left over from painting our windows!

Let the paint dry and pull up the tape and you have a new island!


Comments